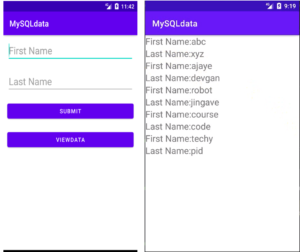
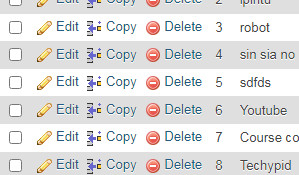
You know in the previous tutorial. We performed PHP MySQL Simple Crud(Create, Read, Update, Delete) operation using MySQL database. Now we will convert this crud data into JSON format. So that we can show this data in recyclerview.
This is a simple task that we do step by step with example when required.
How to convert PHP crud to JSON form and display MySQL data in android recyclerview?
Step: 1 json form
So, guys, our PHP crud operation is complete. Now we will create a new folder inside htdocs or public_html.
After creating the folder, create a PHP JSON named file inside the folder.
The code of the PHP file is the same as displaying the data.
The full code of json.php is given below.
json.php
<?php
include("../db_connection/config.php");
$query="SELECT *FROM crud_operation";
$result=mysqli_query($conn,$query);
$rows=array();
while($row=mysqli_fetch_assoc($result)){
    array_push($rows,array('Id'=>$row['id'],
                          'FirstName'=>$row['fname'],
                          'LastName'=>$row['lname']));
}
echo json_encode($rows);
mysqli_close($conn);
?>
In the above script, we can say that our JSON format data is completed.
Step: 2 new project
Create a new Android project.
Step: 3 libraries
PHP MySQL crud oration with JSON data is ready. Now we parse JSON data using the retrofit and retrofit convert library.
We have already discussed this topic. In previous tutorials, we showed PHP MySQL insert operation and showing data in recyclerview. This is a full PHP MySQL crud operation and displays data in recyclerview.
So guys, here we will be using the following Retrofit 2 and Retrofit 2 Converter-Gson libraries which are given below.
implementation 'com.squareup.retrofit2:retrofit:2.9.0'

    implementation 'com.squareup.retrofit2:converter-gson:2.9.0'
After adding the library, don’t forget to sync the project.
Step: 4 internet permission
We parse JSON objects into an array and show them in android recyclerview. PHP data is hosted online, so we need the internet permission.
Given following internet permission.
<uses-permission android:name="android.permission.INTERNET"/>
Step: 5 activity_main.xml
You know, we focus on UI in XML. First, we create recyclerview in XML default activity_main.xml
Res⇾layout⇾Activity_main.xml
The full code of activity_main.xml is given below.
activity_main.xml
<?xml version="1.0" encoding="utf-8"?>
<RelativeLayout xmlns:android="http://schemas.android.com/apk/res/android"
    xmlns:app="http://schemas.android.com/apk/res-auto"
    xmlns:tools="http://schemas.android.com/tools"
    android:layout_width="match_parent"
    android:layout_height="match_parent"
    tools:context=".MainActivity">
<androidx.swiperefreshlayout.widget.SwipeRefreshLayout
    android:layout_width="match_parent"
    android:layout_height="match_parent"
    android:id="@+id/swipefresh">
    <androidx.recyclerview.widget.RecyclerView
        android:layout_width="match_parent"
        android:layout_height="match_parent"
        android:id="@+id/rv"/>
</androidx.swiperefreshlayout.widget.SwipeRefreshLayout>
</RelativeLayout>
Step: 6 singleview
Create a new layout file named singleview to show the recycling data.
Res⇾right click on layout⇾new ⇾Layout Resource file.
The full code of singleview.xml is given below.
singleview.xml
<?xml version="1.0" encoding="utf-8"?>
<LinearLayout xmlns:android="http://schemas.android.com/apk/res/android"
    xmlns:app="http://schemas.android.com/apk/res-auto"
    android:orientation="vertical"
    android:layout_width="match_parent"
    android:layout_height="wrap_content">
<androidx.cardview.widget.CardView
    android:layout_width="match_parent"
    android:layout_height="wrap_content"
    app:cardElevation="2dp"
    app:cardUseCompatPadding="true"
    app:cardCornerRadius="5dp">
    <LinearLayout
        android:layout_width="match_parent"
        android:layout_height="wrap_content"
        android:orientation="horizontal">
        <TextView
            android:text="@string/app_name"
            android:textSize="24dp"
            android:layout_weight="1"
            android:layout_width="0dp"
            android:layout_height="wrap_content"
            android:id="@+id/firstname"/>
        <TextView
            android:text="@string/app_name"
            android:textSize="24dp"
            android:layout_weight="1"
            android:layout_width="0dp"
            android:layout_height="wrap_content"
            android:id="@+id/lastname"/>
    </LinearLayout>
</androidx.cardview.widget.CardView>
</LinearLayout>
So guys our UI design is ready.
Step 7: Model class
Create a new model named Class to store the data.
Java⇾right click on the package name⇾new⇾java class named Model.
The full code of Model.java is given below.
Model.java
package com.example.jsonparsing;

class Model {
    private String FirstName,LastName;
    //constructor

    public Model(String firstName, String lastName) {
        FirstName = firstName;
        LastName = lastName;
    }
    //getter and setter

    public String getFirstName() {
        return FirstName;
    }

    public void setFirstName(String firstName) {
        FirstName = firstName;
    }

    public String getLastName() {
        return LastName;
    }

    public void setLastName(String lastName) {
        LastName = lastName;
    }
}
Step:8 MyApi
Create an interface called MyApi.java to obtain “GET” requests from the server-side.
Java⇾right click on the package name⇾new⇾java class named MyApi and select interface.
The full code of interface MyApi.java is given below.
MyApi.java
package com.example.jsonparsing;

import java.util.ArrayList;

import retrofit2.Call;
import retrofit2.http.GET;

interface MyApi {
@GET("json.php")
    Call<ArrayList<Model>>modelArr();
}
Step: 9 Adapter
Create a Java class called MyAdapter to set the data.
Java⇾right click on package name ⇾new ⇾java class named MyAdapter.
The full code of interface MyAdapter.java is given below.
MyAdapter.java
package com.example.jsonparsing;

import android.content.Context;
import android.view.LayoutInflater;
import android.view.View;
import android.view.ViewGroup;
import android.widget.TextView;

import androidx.annotation.NonNull;
import androidx.recyclerview.widget.RecyclerView;

import java.util.ArrayList;

class MyAdapter extends RecyclerView.Adapter<MyAdapter.ViewHolder> {
    private ArrayList<Model>modelArrayList;
    private Context context;
    //constructor

    public MyAdapter(ArrayList<Model> modelArrayList, Context context) {
        this.modelArrayList = modelArrayList;
        this.context = context;
    }

    @NonNull
    @Override
    public MyAdapter.ViewHolder onCreateViewHolder(@NonNull ViewGroup parent, int viewType) {
        View view= LayoutInflater.from ( parent.getContext () ).inflate ( R.layout.singleview,parent,false );
        return new ViewHolder (view);
    }

    @Override
    public void onBindViewHolder(@NonNull MyAdapter.ViewHolder holder, int position) {
Model model=modelArrayList.get ( position );
holder.fname.setText ( model.getFirstName () );
holder.lname.setText ( model.getLastName () );
    }

    @Override
    public int getItemCount() {
        return modelArrayList.size ();
    }

    public class ViewHolder extends RecyclerView.ViewHolder {
        TextView fname,lname;
        public ViewHolder(@NonNull View itemView) {
            super ( itemView );
            fname=itemView.findViewById ( R.id.firstname );
            lname=itemView.findViewById ( R.id.lastname );
        }
    }
}
Step: 10 MainActivity
Go to MainActivity.java and call the adapter class, API as well as recyclerview.
Java⇾package name⇾and open MainActivity.java which is the default activity.
Modify using the following code.
MainActivity.java
package com.example.jsonparsing;

import androidx.appcompat.app.AppCompatActivity;
import androidx.recyclerview.widget.LinearLayoutManager;
import androidx.recyclerview.widget.RecyclerView;
import androidx.swiperefreshlayout.widget.SwipeRefreshLayout;

import android.os.Bundle;
import android.os.Handler;
import android.widget.Toast;

import java.util.ArrayList;

import retrofit2.Call;
import retrofit2.Callback;
import retrofit2.Response;
import retrofit2.Retrofit;
import retrofit2.converter.gson.GsonConverterFactory;

public class MainActivity extends AppCompatActivity {
MyAdapter myAdapter;
MyApi myApi;
String BaseUrl="https://androidcode99.000webhostapp.com/crud/Json/";
RecyclerView recyclerView;
ArrayList<Model>modelArrayList;
SwipeRefreshLayout swipeRefreshLayout;
    @Override
    protected void onCreate(Bundle savedInstanceState) {
        super.onCreate ( savedInstanceState );
        setContentView ( R.layout.activity_main );
        modelArrayList=new ArrayList<> ();
        findId();
        disJson();
        swipeRefrsh();
    }

    private void swipeRefrsh() {
        swipeRefreshLayout.setOnRefreshListener ( new SwipeRefreshLayout.OnRefreshListener () {
            @Override
            public void onRefresh() {
                afterRefrsh();
                new Handler ().postDelayed ( new Runnable () {
                    @Override
                    public void run() {
                        swipeRefreshLayout.setRefreshing ( false );
                    }
                },3000 );
            }
        } );
    }

    private void afterRefrsh() {
        disJson ();
    }

    private void disJson() {
        Retrofit retrofit=new Retrofit.Builder ()
                .baseUrl ( BaseUrl )
                .addConverterFactory ( GsonConverterFactory.create () )
                .build ();
        myApi=retrofit.create ( MyApi.class );
        Call<ArrayList<Model>>arrayListCall=myApi.modelArr ();
        arrayListCall.enqueue ( new Callback<ArrayList<Model>> () {
            @Override
            public void onResponse(Call<ArrayList<Model>> call, Response<ArrayList<Model>> response) {
                modelArrayList=response.body ();
                for (int i=0;i<modelArrayList.size ();i++){
                    //layout manager
                    LinearLayoutManager manager=new LinearLayoutManager (MainActivity.this );
                    recyclerView.setLayoutManager ( manager );
                    //set adapter
                    myAdapter=new MyAdapter ( modelArrayList,MainActivity.this );
                    recyclerView.setAdapter ( myAdapter );
                }
            }

            @Override
            public void onFailure(Call<ArrayList<Model>> call, Throwable t) {
//show massesage when dataq does not load
                Toast.makeText ( MainActivity.this, "data does not load", Toast.LENGTH_SHORT ).show ();
            }
        } );
    }

    private void findId() {
        recyclerView=findViewById ( R.id.rv );
        swipeRefreshLayout=findViewById ( R.id.swipefresh );
    }
}
Our PHP MySQL crud operation is complete with showing the data in the recyclerview.
Now run your project and see the output. Update data in PHP MySQL and run your app again, delete data in PHP MySQL and run the app again. That is PHP MySQL crud operation that changes in recycleview.
Note: In this post, if you find any mistakes or bugs and errors, feel free to contact or give feedback to improve the quality. Great if you give your feedback about this tutorial and other tutorials.


