Already we completed RecyclerView read and display operation in android studio. Now we are going to start the complete CRUD (Create, Read, Update, Delete) operation in RecyclerView.
Which database is used in CRUD RecyclerView?
In this RecycerView CRUD operation tutorial, SQLite database was used to store, retrieve, update and delete data.
Now, let’s start RecyclerView CRUD operation.
Step 1: open android studio
First of all open Android Studio.
Step 2: new project
Create a new project named whatever you like.
Step 3: create database java class
First we will need a database class file to store the database. So first create a database class file.
App⇾java⇾right click on package name⇾new ⇾java class
Named DBmain.java (you can name anything).
In DBmain class extends abstract class SQLiteOpenHelper to manage database creation and version management and “implement abstract method ‘onCreate and onUpgrade.
You can see the below code of DBmain.java code
DBmain.java
package com.example.recyclerviewcrud;

import android.content.Context;
import android.database.sqlite.SQLiteDatabase;
import android.database.sqlite.SQLiteOpenHelper;

import androidx.annotation.Nullable;

public class DBmain extends SQLiteOpenHelper {
    public static final String DBNAME="student.db";
    public static final String TABLENAME="course";
    public static final int VER=1;
    String query;
    public DBmain(@Nullable Context context) {
        super(context, DBNAME, null, VER);
    }

    @Override
    public void onCreate(SQLiteDatabase db) {
        query="create table "+TABLENAME+"(id integer primary key, fname text, lname text)";
        db.execSQL(query);
    }

    @Override
    public void onUpgrade(SQLiteDatabase db, int oldVersion, int newVersion) {
    query="drop table if exists "+TABLENAME+"";
    db.execSQL(query);
    onCreate(db);
    }
}
Step 4: activity_main.xml
Now open activity_main.xml
app⇾res⇾ layout⇾activity_main.xml(this is default activity that automatically created).
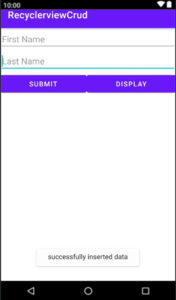
In activity_main.xml we will use EditTexts and Buttons to insert and display data.
Below given activity_main.xml code.
activity_main.xml
<?xml version="1.0" encoding="utf-8"?>
<LinearLayout xmlns:android="http://schemas.android.com/apk/res/android"
    xmlns:app="http://schemas.android.com/apk/res-auto"
    xmlns:tools="http://schemas.android.com/tools"
    android:layout_width="match_parent"
    android:layout_height="match_parent"
    android:orientation="vertical"
    tools:context=".MainActivity">

    <EditText
        android:layout_width="match_parent"
        android:layout_height="wrap_content"
        android:id="@+id/edit_fname"
        android:hint="First Name"/>
<EditText
    android:layout_width="match_parent"
    android:layout_height="wrap_content"
    android:id="@+id/edit_lname"
    android:hint="Last Name"/>

    <LinearLayout
        android:layout_width="match_parent"
        android:layout_height="wrap_content"
        android:orientation="horizontal">
        <Button
            android:layout_width="wrap_content"
            android:layout_height="wrap_content"
            android:layout_weight="1"
            android:text="Submit"
            android:id="@+id/submit_btn"/>
        <Button
            android:layout_width="wrap_content"
            android:layout_height="wrap_content"
            android:id="@+id/display_btn"
            android:text="Display"
            android:layout_weight="1"/>
        <Button
            android:layout_width="wrap_content"
            android:layout_height="wrap_content"
            android:id="@+id/edit_btn"
            android:text="Edit"
            android:visibility="gone"/>
    </LinearLayout>
</LinearLayout>
Step 5: MainActivity.java
Go to the MainActivity.java file
In the MainActivity.java activity we will do some tasks like inserting data, updating data and displaying data.
We already know about this.
The code of MainActivity.java is given below.
MainActivity.java
package com.example.recyclerviewcrud;

import androidx.appcompat.app.AppCompatActivity;

import android.content.ContentValues;
import android.content.Intent;
import android.database.sqlite.SQLiteDatabase;
import android.os.Bundle;
import android.view.View;
import android.widget.Button;
import android.widget.EditText;
import android.widget.Toast;

import static com.example.recyclerviewcrud.DBmain.TABLENAME;

public class MainActivity extends AppCompatActivity {
    DBmain dBmain;
    SQLiteDatabase sqLiteDatabase;
    EditText fname, lname;
    Button submit, display, edit;
    int id = 0;

    @Override
    protected void onCreate(Bundle savedInstanceState) {
        super.onCreate(savedInstanceState);
        setContentView(R.layout.activity_main);
        dBmain = new DBmain(this);
        //create method
        findid();
        insertData();
        editData();
    }

    private void editData() {
        if (getIntent().getBundleExtra("userdata")!=null){
            Bundle bundle=getIntent().getBundleExtra("userdata");
            id=bundle.getInt("id");
            fname.setText(bundle.getString("fname"));
            lname.setText(bundle.getString("lname"));
            edit.setVisibility(View.VISIBLE);
            submit.setVisibility(View.GONE);
        }
    }

    private void insertData() {
        submit.setOnClickListener(new View.OnClickListener() {
            @Override
            public void onClick(View v) {
                ContentValues cv = new ContentValues();
                cv.put("fname", fname.getText().toString());
                cv.put("lname", lname.getText().toString());

                sqLiteDatabase = dBmain.getWritableDatabase();
                Long recinsert = sqLiteDatabase.insert(TABLENAME, null, cv);
                if (recinsert != null) {
                    Toast.makeText(MainActivity.this, "successfully inserted data", Toast.LENGTH_SHORT).show();
                    //clear when click on submit
                    fname.setText("");
                    lname.setText("");
                } else {
                    Toast.makeText(MainActivity.this, "something wrong try again", Toast.LENGTH_SHORT).show();
                }
            }
        });
        //when click on display button open display data activity
        display.setOnClickListener(new View.OnClickListener() {
            @Override
            public void onClick(View v) {
                Intent intent=new Intent(MainActivity.this,DisplayData.class);
                startActivity(intent);
            }
        });
        //storing edited data
        edit.setOnClickListener(new View.OnClickListener() {
            @Override
            public void onClick(View v) {
                ContentValues cv=new ContentValues();
                cv.put("fname",fname.getText().toString());
                cv.put("lname",lname.getText().toString());

                sqLiteDatabase=dBmain.getReadableDatabase();
                long recedit=sqLiteDatabase.update(TABLENAME,cv,"id="+id,null);
                if (recedit!=-1){
                    Toast.makeText(MainActivity.this, "Data updated successfully", Toast.LENGTH_SHORT).show();
                    submit.setVisibility(View.VISIBLE);
                    edit.setVisibility(View.GONE);
                }else{
                    Toast.makeText(MainActivity.this, "something wrong try again", Toast.LENGTH_SHORT).show();
                }
            }
        });
    }
    private void findid() {
        fname = (EditText) findViewById(R.id.edit_fname);
        lname = (EditText) findViewById(R.id.edit_lname);
        submit = (Button) findViewById(R.id.submit_btn);
        display = (Button) findViewById(R.id.display_btn);
        edit = (Button) findViewById(R.id.edit_btn);
    }
}
The SQLite database insertion work is complete. Now start displaying the database in the new activity.
Step 6: Model class
Create a Model class and generate constructor and getter and setter methods.
App⇾java ⇾right click on Package name⇾new ⇾java class.
Given below code of Model.java class
Model.java
package com.example.recyclerviewcrud;

public class Model {
    private int id;
    private String firstname;
    private String lastname;
    //generate constructor

    public Model(int id, String firstname, String lastname) {
        this.id = id;
        this.firstname = firstname;
        this.lastname = lastname;
    }
    //generate getter and setter

    public int getId() {
        return id;
    }

    public void setId(int id) {
        this.id = id;
    }

    public String getFirstname() {
        return firstname;
    }

    public void setFirstname(String firstname) {
        this.firstname = firstname;
    }

    public String getLastname() {
        return lastname;
    }

    public void setLastname(String lastname) {
        this.lastname = lastname;
    }
}
Step 7: Adapter
Create a new Java class named MyAdater to set the data in the RecyclerView.
The code of the adapter class is given below
MyAdater.java
package com.example.recyclerviewcrud;

import android.content.Context;
import android.content.Intent;
import android.database.sqlite.SQLiteDatabase;
import android.os.Bundle;
import android.view.LayoutInflater;
import android.view.View;
import android.view.ViewGroup;
import android.widget.Button;
import android.widget.TableRow;
import android.widget.TextView;
import android.widget.Toast;

import androidx.annotation.NonNull;
import androidx.recyclerview.widget.RecyclerView;

import java.util.ArrayList;

import static com.example.recyclerviewcrud.DBmain.TABLENAME;

public class MyAdapter extends RecyclerView.Adapter<MyAdapter.ModelViewHolder> {
    Context context;
    ArrayList<Model>modelArrayList=new ArrayList<>();
    SQLiteDatabase sqLiteDatabase;
    //generate constructor

    public MyAdapter(Context context, int singledata, ArrayList<Model> modelArrayList, SQLiteDatabase sqLiteDatabase) {
        this.context = context;
        this.modelArrayList = modelArrayList;
        this.sqLiteDatabase = sqLiteDatabase;
    }

    @NonNull
    @Override
    public MyAdapter.ModelViewHolder onCreateViewHolder(@NonNull ViewGroup parent, int viewType) {
        LayoutInflater inflater=LayoutInflater.from(context);
        View view=inflater.inflate(R.layout.singledata,null);
        return new ModelViewHolder(view);
    }

    @Override
    public void onBindViewHolder(@NonNull MyAdapter.ModelViewHolder holder, int position) {
        final Model model=modelArrayList.get(position);
        holder.txtfname.setText(model.getFirstname());
        holder.txtlname.setText(model.getLastname());

        //click on button go to main activity
        holder.edit.setOnClickListener(new View.OnClickListener() {
            @Override
            public void onClick(View v) {
                Bundle bundle=new Bundle();
                bundle.putInt("id",model.getId());
                bundle.putString("fname",model.getFirstname());
                bundle.putString("lname",model.getLastname());
                Intent intent=new Intent(context,MainActivity.class);
                intent.putExtra("userdata",bundle);
                context.startActivity(intent);
            }
        });
        //delete row
        holder.delete.setOnClickListener(new View.OnClickListener() {
            DBmain dBmain=new DBmain(context);
            @Override
            public void onClick(View v) {
                sqLiteDatabase=dBmain.getReadableDatabase();
                long delele=sqLiteDatabase.delete(TABLENAME,"id="+model.getId(),null);
            if (delele!=-1){
                Toast.makeText(context, "deleted data successfully", Toast.LENGTH_SHORT).show();
                modelArrayList.remove(position);
                notifyDataSetChanged();
            }
            }
        });
    }
    @Override
    public int getItemCount() {
        return modelArrayList.size();
    }

    public class ModelViewHolder extends RecyclerView.ViewHolder {
        TextView txtfname,txtlname;
        Button edit,delete;
        public ModelViewHolder(@NonNull View itemView) {
            super(itemView);
            txtfname=(TextView)itemView.findViewById(R.id.txtfname);
            txtlname=(TextView)itemView.findViewById(R.id.txtlname);
            edit=(Button)itemView.findViewById(R.id.txt_btn_edit);
            delete=(Button)itemView.findViewById(R.id.txt_btn_delete);
        }
    }
}
Step 8: single view
Now create singledata xml file for single data view.
App⇾layout⇾new Layout Resource File.
Given below code of singledata.xml
Singledata.xml
<?xml version="1.0" encoding="utf-8"?>
<androidx.cardview.widget.CardView xmlns:android="http://schemas.android.com/apk/res/android"
    xmlns:app="http://schemas.android.com/apk/res-auto"
    android:layout_width="match_parent"
    android:layout_height="match_parent"
    app:cardCornerRadius="9dp"
    app:cardElevation="1dp"
    app:cardPreventCornerOverlap="true"
    app:cardUseCompatPadding="true">

    <RelativeLayout
        android:layout_width="match_parent"
        android:layout_height="match_parent">

        <TextView
            android:id="@+id/txtfname"
            android:layout_width="match_parent"
            android:layout_height="wrap_content"
            android:text="@string/app_name"
            android:textSize="20dp"
            android:textStyle="bold" />

        <TextView
            android:id="@+id/txtlname"
            android:layout_width="match_parent"
            android:layout_height="wrap_content"
            android:layout_below="@+id/txtfname"
            android:text="@string/app_name"
            android:textSize="20dp"
            android:textStyle="bold" />
        <LinearLayout
            android:layout_below="@+id/txtlname"
            android:layout_width="match_parent"
            android:layout_height="wrap_content"
            android:orientation="horizontal">
            <Button
                android:layout_width="wrap_content"
                android:layout_height="wrap_content"
                android:id="@+id/txt_btn_edit"
                android:layout_weight="1"
                android:text="Edit"/>
            <Button
                android:layout_width="wrap_content"
                android:layout_height="wrap_content"
                android:id="@+id/txt_btn_delete"
                android:layout_weight="1"
                android:text="Delete"/>
        </LinearLayout>
    </RelativeLayout>
</androidx.cardview.widget.CardView>
Step 9: RecyclerView
Now, create a new activity named DisplayData.
In the DisplayData activity, we will first create the layout design.
Open activity_display_data.xml
App⇾Layout⇾ activity_display_data.xml
Given below code of activity_display_data.xml
activity_display_data.xml
<?xml version="1.0" encoding="utf-8"?>
<RelativeLayout xmlns:android="http://schemas.android.com/apk/res/android"
    xmlns:app="http://schemas.android.com/apk/res-auto"
    xmlns:tools="http://schemas.android.com/tools"
    android:layout_width="match_parent"
    android:layout_height="match_parent"
    tools:context=".DisplayData">
<androidx.recyclerview.widget.RecyclerView
    android:layout_width="match_parent"
    android:layout_height="match_parent"
    android:id="@+id/rv"/>
</RelativeLayout>
Step 10: DisplayData
Now, execute the Displaying Data task.
Open DispalyData.java activity.
App⇾java ⇾package name⇾DisplayData.java
Given below code for DispalyData.java
DispalyData.java
package com.example.recyclerviewcrud;

import androidx.appcompat.app.AppCompatActivity;
import androidx.recyclerview.widget.LinearLayoutManager;
import androidx.recyclerview.widget.RecyclerView;

import android.database.Cursor;
import android.database.sqlite.SQLiteDatabase;
import android.os.Bundle;

import java.lang.reflect.Array;
import java.util.ArrayList;

import static com.example.recyclerviewcrud.DBmain.TABLENAME;

public class DisplayData extends AppCompatActivity {
DBmain dBmain;
SQLiteDatabase sqLiteDatabase;
RecyclerView recyclerView;
MyAdapter myAdapter;
    @Override
    protected void onCreate(Bundle savedInstanceState) {
        super.onCreate(savedInstanceState);
        setContentView(R.layout.activity_display_data);
        dBmain=new DBmain(this);
        //create method
        findid();
        displayData();
        recyclerView.setLayoutManager(new LinearLayoutManager(this));
    }

    private void displayData() {
        sqLiteDatabase=dBmain.getReadableDatabase();
        Cursor cursor=sqLiteDatabase.rawQuery("select *from "+TABLENAME+"",null);
        ArrayList<Model>modelArrayList=new ArrayList<>();
        while (cursor.moveToNext()){
            int id=cursor.getInt(0);
            String fname=cursor.getString(1);
            String lname=cursor.getString(2);
            modelArrayList.add(new Model(id, fname, lname));
        }
        cursor.close();
        myAdapter=new MyAdapter(this,R.layout.singledata,modelArrayList,sqLiteDatabase);
        recyclerView.setAdapter(myAdapter);
    }

    private void findid() {
        recyclerView=findViewById(R.id.rv);
    }
}
Now, run your program and see the output.


