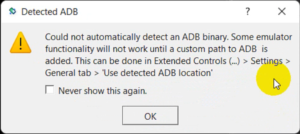
When you install a new android studio or initiate an emulator, then this type of error message comes while running the app.
Could not automatically detect an ADB binary. Some emulator functionality will not work
until a custom path to ADB is added.
This can be done in Extended Controls (…) > Settings > General tab > Use detected ADB location’. At the time when you run your app in Android Studio, Could not automatically detect ADB binary. Some emulator functionality will not work
unless a custom path is added for ADB. The error comes because the android studio could not locate the path. So you need to add the ADB custom path.

Let’s try to figure out practically “Could not automatically detect ADB binary.” Error in Android Studio.
Step: 1
start emulator
We want to set a custom path for ADB, hence the essential to start the emulator.
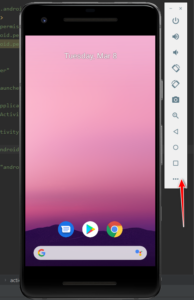
Step: 2
Click on the three dots as seen in the following picture.

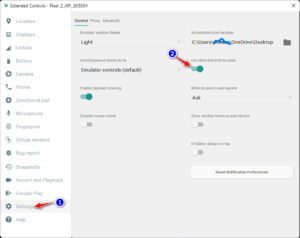
Step: 3
now click settings.
Step: 4
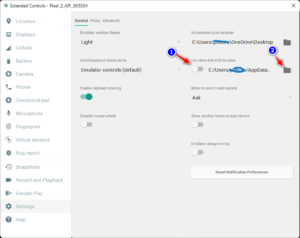
Here you can see “Use detected ADB location”
Disable the toggle button and set the ADB custom path.

Step: 5
select adb.exe path.
C:/Users/username/AppData/Local/Android/Sdk/platform-tools/adb.exe

Step: 6
Right-click on the “Could not automatically detect ADB binary” dialogue and run your app again.
Maybe this error message goes.