Today, we will walk you through the detailed process of creating a Google Play Developer Account.
Creating a Google Play Developer Account is a multi-step process that allows you to publish and manage your apps on the Google Play Store.
Let’s start by understanding what Google Play Console is and then delve into the step-by-step process of setting up a Google Play Developer Account.
What is google play console?
Google Play Console is a platform provided by Google that allows developers to publish and manage their apps on the Google Play Store. Before creating a Google Play Developer Account, it’s essential to understand the purpose and functionality of the Google Play Console.
How to create google developer account?
Here is given step by step process to Creating google play developer account
Step 1: Search on Google
Open your preferred web browser and search for “Google Play Console” in the search bar. Hit Enter. The official Google Play Console website should appear as the first or second result, usually at play.google.com/console/account.
Step 2 Google Play Console page
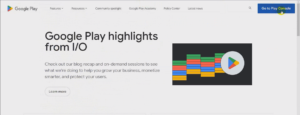
On the Google Play Console page, you’ll find a “Go to Play Console” button located in the top-right corner. Click on this button to proceed.
Step 3: Sign In
If you are not already signed in to your Google account, you will be prompted to sign in. Enter your Google account credentials to proceed.
Step 4: Google Play Console account
Upon signing in, you have successfully accessed the Google Play Console account. You will see a dashboard
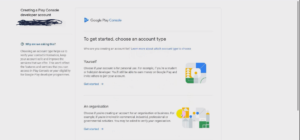
Upon signing in, you have successfully accessed the Google Play Console account. You will see a dashboard prompting you to choose an account type: “Yourself” or “An organization.” For this guide, we’ll choose “Yourself.”
Yourself:
Choosing “Yourself” means that you are creating a Google Play Developer Account as an individual. This is a suitable option if you’re an independent developer, freelancer, or someone who wants to publish apps under your personal name. The account will be associated with your personal information, including your name and email address. Any apps you publish will be attributed to you as an individual developer.
An organization:
Selecting “An organization” means that you are creating a Google Play Developer Account on behalf of a company, business, or organization. This is the appropriate option if you’re part of a team, company, or entity that wants to publish apps collectively. The account will be associated with the organization’s name, and you’ll need to provide information such as the organization’s email address, official contact person, and relevant details.
When you choose “An organization,” you will likely need to provide additional documentation to prove the authenticity of the organization, such as official business registration documents.
Here we will be choosing yourself so just click on it.
Step-5: About you
You’ll be asked to provide information about your Google Play and Android experience. This is a chance to showcase your previous experience. Only you can see this information.
Additionally, you’ll encounter options related to having other Google accounts.
If you have a Google Console account, select “Yes,” otherwise select “No.”
If you have a website, enter its URL; if not, checkmark “I don’t have a website. And ” Click “NEXT” to continue.
Step 6: Developer account
In this section, you’ll need to provide details about your developer account:
Developer Account Name: This is the public name for your developer account that will be displayed on Google Play.
- Contact Name: Enter the name you want to be associated with on Google Play.
- Contact Email Address: Provide your email address.
- Preference Language: Select your preferred language.
- Contact Address: Enter your contact address details.
- Contact Phone Number: Provide your phone number.
After filling out this information, click “NEXT.”
Step 7: Apps
On this page, you’ll be able to specify details related to your apps, including the number of apps you intend to publish, whether you plan on earning money through Google Play, and the categories of your apps. Fill in the required details and click “NEXT.”
Step 8: Term
Read and check the checkboxes to agree to the terms and conditions.
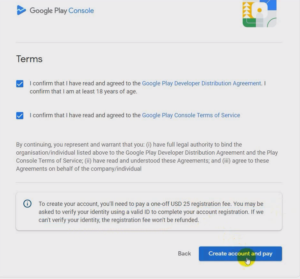
Note that there’s a $25 registration fee for the Google Play Developer Account. Click on the “Create Account and Pay” button.
Step 9: Add Credit or Debit Card
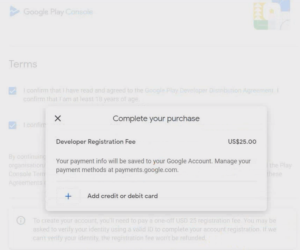
A pop-up box will appear. If you’re ready to pay, click on “Add Credit or Debit Card.” Enter your card information. Google Play Console supports major debit and credit cards Like
- Mastercard
- Visa
- American Express
- Discover (United States only)
- Visa Electron (outside of the United States).
Once entered, click on “Saved Card.”
For more information read on this answer
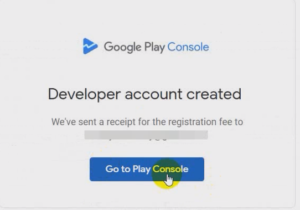
Step 10: Go to Play Console
Congratulations! Your developer account has been successfully created. Click on the “Go to Play Console” button to access your dashboard.
Step 11: dashboard
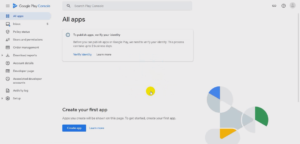
You’ll be redirected to the Play Console dashboard, where you’ll manage your apps and account.
Step 12: successfully created Developer Account
Congratulations! You’ve now successfully created a Google Play Developer Account. This guide has taken you through the step-by-step process, from accessing Google Play Console to setting up your developer account.
As an additional step, you might need to verify your identity. Follow the prompts to complete the identity verification process.
In future tutorials, we’ll cover how to verify your identity and the required documents for verification.